Friday, 10 February 2012

Kristen Stewart Make-Up Tutorial


Today I will be doing a step-by-step guide on how to get a Kristen Stewart inspired make-up look. She wears this look for many premier's and such. I did this tutorial using the Urban Decay Naked eye shadow palette, but there are many drug store dupes that can be used.

For The Face
Foundation: MAC Studio Fix Fluid in 'NW15'
Blusher: Too Face Full Bloom Ultra Flush Powder Blush in 'Sweet Pink'

For The Eyes

Step 1: Start by priming your eyes. I used Urban Decay Primer Potion as this is my absolute favourite and keeps your eye shadow in place for hours.  (You can see my Top 3 eye shadow primers review here. )

Step 2: Apply the colour 'Gunmetal' (deep metallic grey), over the lower part of your lid, up to the crease, using a small eye shadow brush.


Step 3: Using the same brush, apply 'Creep' (shimmery black colour), onto the very outer corner of your eye, just to darken it up.


Step 4: Using the colour 'Buck' (warm brown colour), on a larger fluffy brush blend this into the crease.
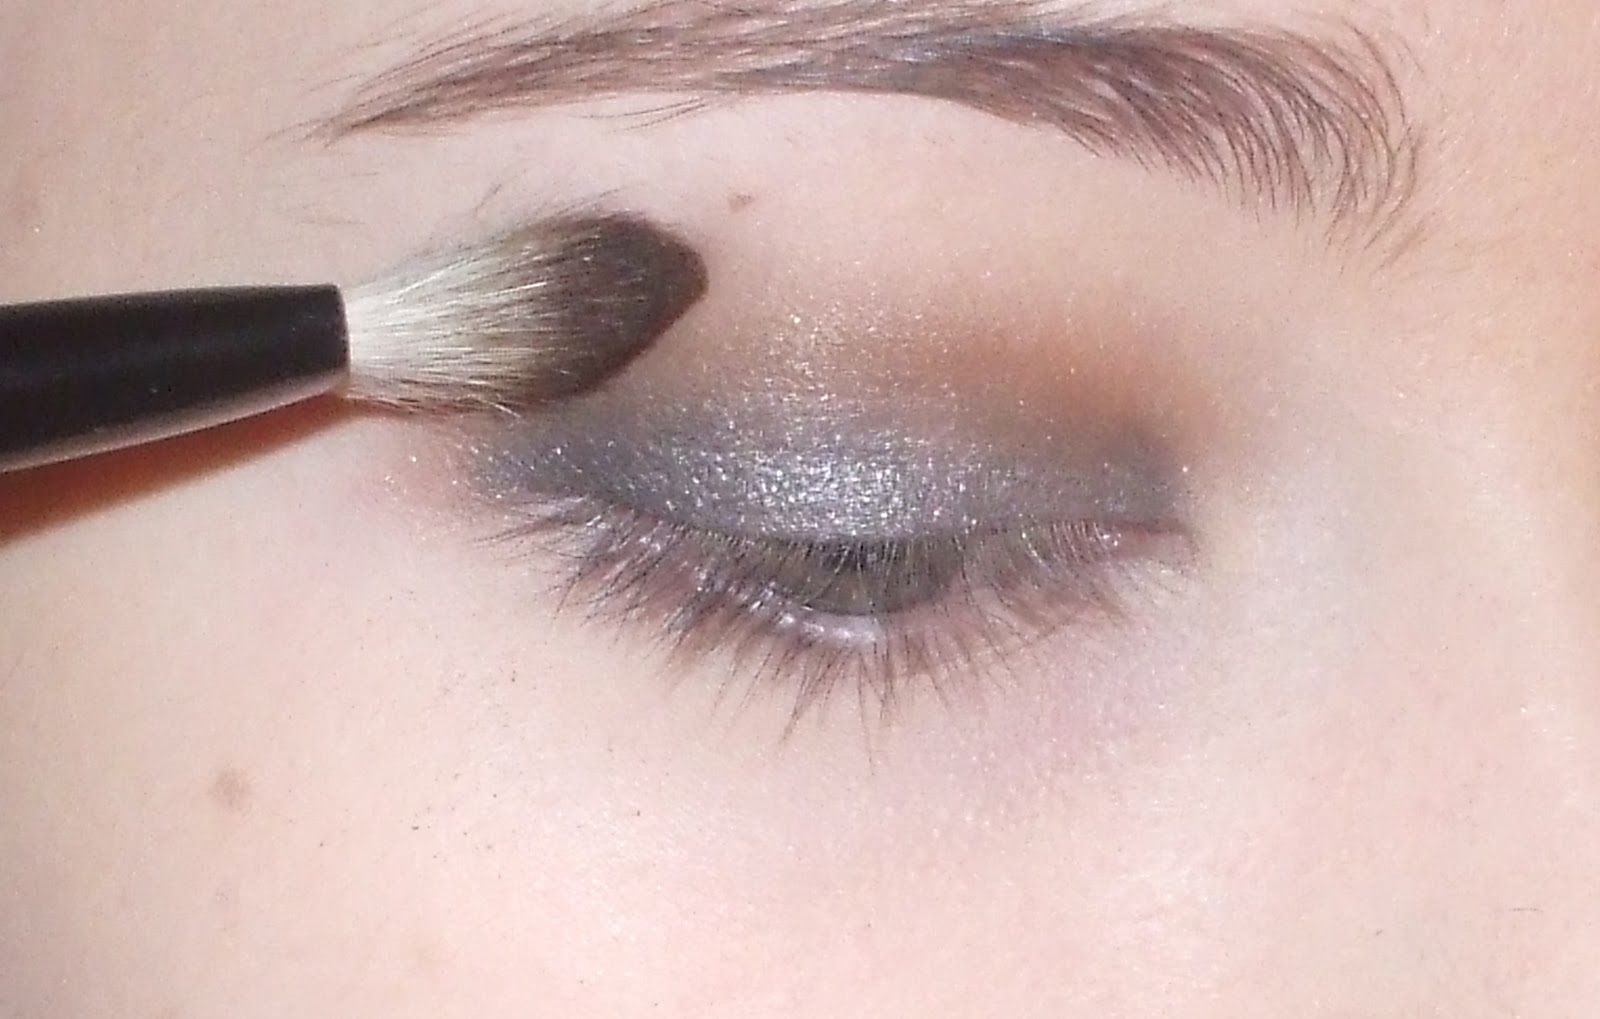

Step 5: With a smaller crease brush, take the colour 'Buck' again and blend it along the lower lash line.


Step 6: On a small, flat brush take the colour 'Gunmetal' again, and apply this as close to the lower lash line as you can.


Step 7: Apply black eye liner ( I used Smoulder by MAC), to your upper and lower water line.
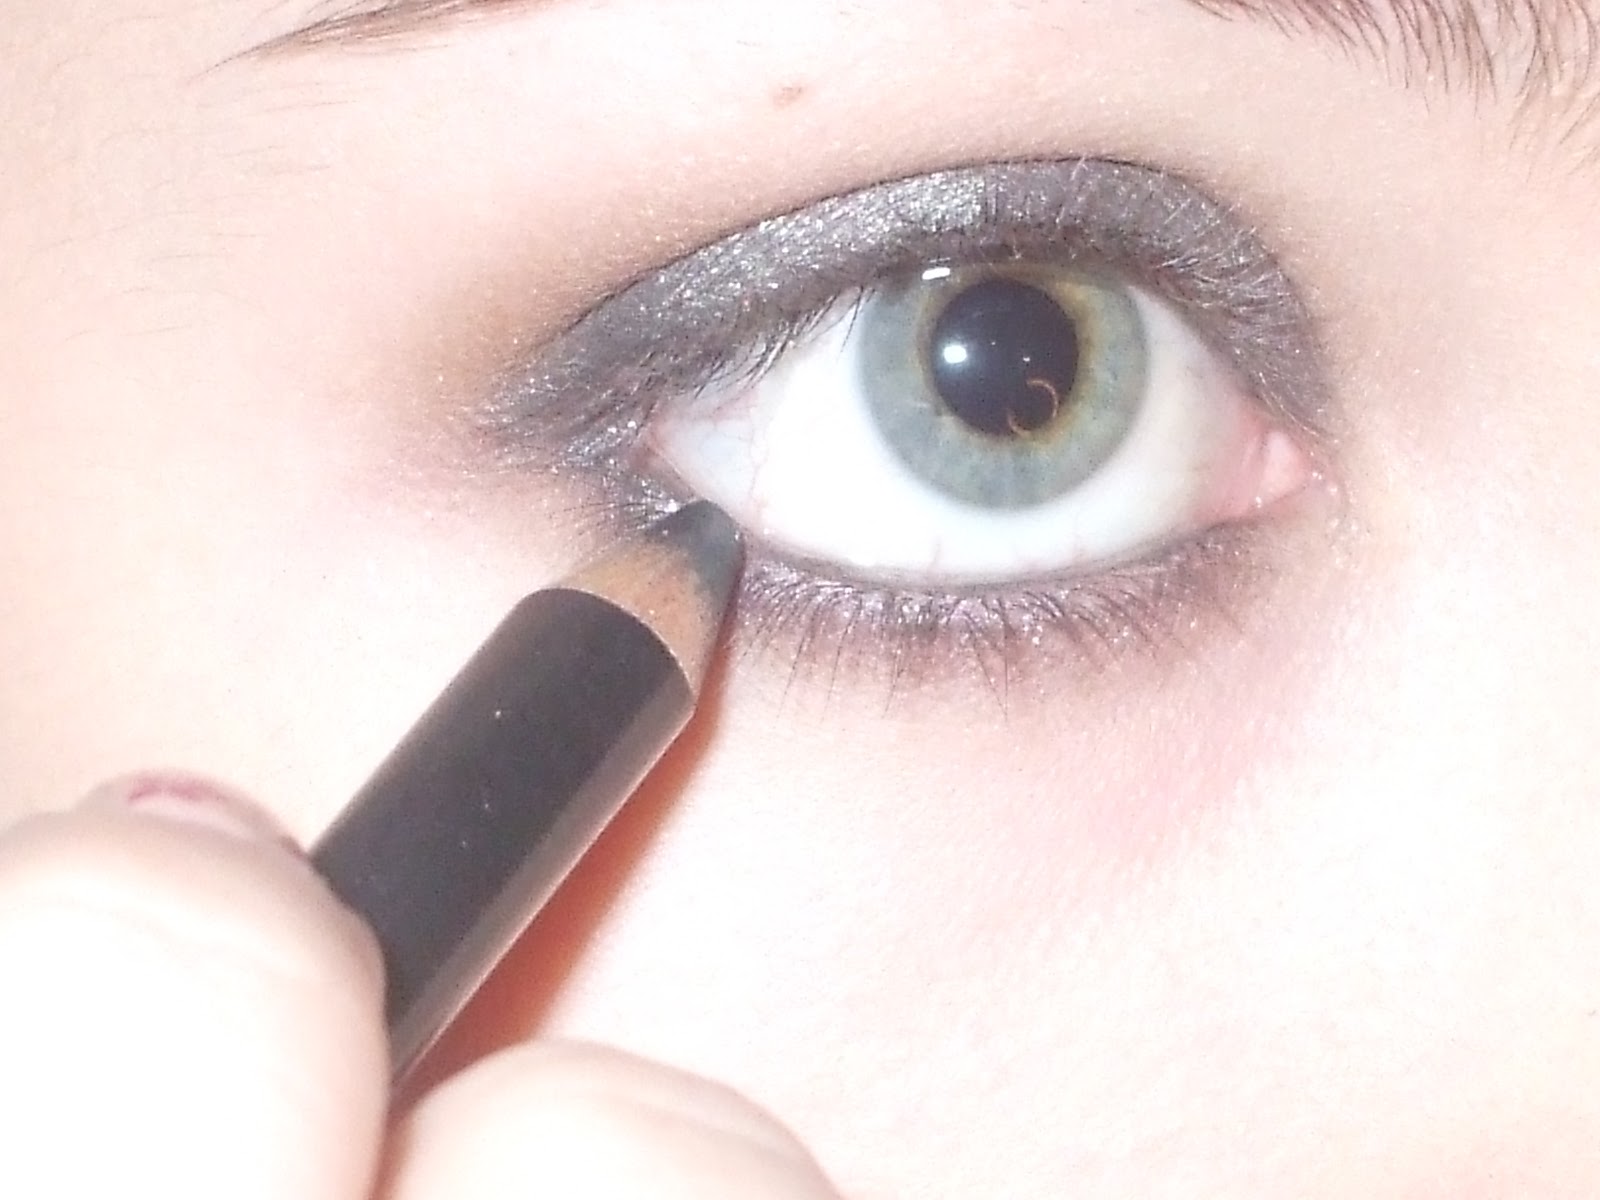

Step 8: Then curl your eye lashes and apply mascara.


For The Lips
I lined my lips using Myface Cosmetics Lip Pencil Fair in 'Rose Petal'. Then over the top of that I used Prestige Skin Loving Minerals Lasting Moisture Lip Gloss in 'Cozy Plum'. 


I hope this is helpful and feel free to ask questions. Have a nice day and don't forget to follow! :)

You can purchase the products mentioned from:

Face
Too Faced Blusher: Discontinued but a similar one would be Rimmel Multi-Tonal Powder Blush in Autumn Catwalk: http://www.boots.com/en/Rimmel-Multi-Tonal-Powder-Blush_929030/

Eyes

Lips

Thursday, 9 February 2012

Valentines Day Nail Tutorial: Floral

For this tutorial you will need:
-Base Coat (optional)
- A Nude Nail Varnish (again!)
-A Dark Pink Nail Varnish
-Konad Stamper Kit and M57 image plate
-High Shine Top Coat

Step 1: As always, prepare your nails by filing them to desired shape and length. Then wipe over with acetone to remove any oils, and apply base coat.

Step 2: Apply two thin coats of nude nail varnish ( I used Blushing by Creative Nail Design again!). Wait for this to dry completely, before moving on to step 3.

Step 3: Nail art time! I did this design by using the floral pattern on the M57 image plate. Apply nail varnish ( I used Cabaret by Ciate Paint Pots) over the design on the image plate, then using the scraper, scrape off excess nail varnish. Using the smaller end of the stamper, press down hard over the pattern so that it transfers to the stamper. Then align the pattern on the stamper with where you want it placed on the nail. Then roll down over the nail firmly. (This may sound tricky, but there are lots of tutorials on YouTube to help you). 

Step 4: Repeat step 3 if desired. I stamped my nails a few times each so that the design filled up the space on the nail.  

Step 5: Apply Top Coat ( I used Seche Vite)

Voila! Elegant, floral nails perfect for Valentines Day.

As always, feel free to ask any questions, and don't forget to follow! Have a nice day :)

You can purchase the products mentioned from:

Blushing by Creative Nail Design. As far as I know this colour has been discontinued but Nude Attitude by Essie is similar. (http://www.beverlybeaute.com/shop/goods/goods_view.php?&goodsno=1160&category=002001026 )


Tuesday, 7 February 2012

Nail Tutorial: Nude Lace


What you will need for this tutorial:
-Base Coat 
-Nude Nail Varnish 
-Black/Sparkly Black Nail Varnish
-Konad Stamper Kit and M57 image plate
-High Shine Top Coat

(Above: Konad Stamper Kit and M57 Image Plate)

Kit includes: 1 Double ended stamper, 1 image plate holder, 1 scraper and 1 M57 image plate.
(Links to where you can purchase this at the end of the post)

Step 1: Prepare your nails by filing them to desired shape, then wipe over with acetone to remove any oils (this makes the polish last longer).

Step 2: Apply base coat ( I used Sticky by Creative Nail Design)

Step 3: Apply two coats of a nude polish ( I used Blushing by Creative Nail Design). Allow to dry thoroughly or it will smudge when it comes to the next step.

Step 4: Time for the stamping! Paint black polish (I used Twilight by Ciate) over the lace design on the M57 image plate. Using the scraper, scrape off excess polish off the plate. Then press down hard onto the plate over the design with the larger side of the stamper. Then align the design with the tip of your fingernail and roll over firmly. (I did this at a slight angle, but you can do it straight across if you'd prefer)

Note: It takes a little while to get used to the stamper, but you will get the hang of it!

Step 5: Apply a high shine top coat. (I used Seche Vite)

..and voila! Easy nail art. 


If you have any questions feel free to ask, and don't forget to follow! :)

You can purchase products mentioned from:

Blushing Nail Colour- I think this particular colour has been continued but Nude Attitude by Essie is similar (http://www.beverlybeaute.com/shop/goods/goods_view.php?&goodsno=1160&category=002001026 )


Twilight by Ciate Nail Paints ( http://www.beautybay.com/cosmetics/ciate/twilight/ )

Nail of the Day: #182 Blushing by Creative Nail Design

(Above: Blushing by Creative Nail Design)

So, today I'm wearing a lovely nude colour which is a good versatile colour if you're not sure what outfit you're going to be wearing. This nail varnish is REALLY pigmented. Usually with nude colours you have to do layer up on layer to get the colour opaque. But with this one I just did two coats and it is completely opaque. 

Hope you have a great day, and don't forget to follow :)

Monday, 6 February 2012

January Favourites

My favourites for the month of January:
-MAC eye shadow in 'Emabrk'
-MAC eye shadow in 'Shroom'
-Too Faced Full Bloom Ultra Flush Powder Blush in 'Sweet Pink'
-BK42 Bullet Crease brush from Crown Brushes
- Bourjois Healthy Mix Foundation
-Mac Penultimate Brow Marker
-Gucci Eau de Parfum II

(Above: Mac Eye Shadow in 'Shroom' - left, and 'Embark' -right.) 

Shroom is the perfect highlight colour and has just the right amount of shimmer. Embark is a nice deep, reddish brown colour perfect for the crease.

~

(Above: Bourjois Healthy Mix Foundation)

I've been using this foundation for quite a few months now, it gives a lovely, dewy finish and applies really nicely. It doesn't make me break out and it last for hours!

~

(Above: Too Faced Full Bloom Ultra Flush Powder Blush)

I've had this blusher for a number of months now, but have only started using it religiously this month. It's a lovely sheer pink colour, with just the right amount of shimmer. 

(Above: Too Faced blusher in 'Sweet Pink')

~

(Above: MAC Penultimate Brow Marker)

This little treat makes doing your eyebrows a doddle! It's easy to apply and makes it really easy to give your eyebrows shape and definition, and it lasts for hours, even without setting it!

~

(Above: BK42 Bullet Crease brush from Crown Brushes)

This brush is the perfect size to fit right into your crease and blends your eye shadow out really well. Its long handle gives great precision and it's not expensive!

(Above: Gucci Eau de Parfum II)

This perfume is by far my favourite from my vast collection! It's the perfect scent to blast a bit of summery-ness into these cold winter days.

If you'd like me to do a full review on any of these products don't be afraid to ask, and remember to follow! :)

You can get the products mentioned from:
MAC Products- Their online store UK ( http://www.maccosmetics.co.uk/ ), US ( http://www.maccosmetics.com/index.tmpl ) or in many department stores.

Bourjois Foundation- UK Boots Stores or online ( http://www.boots.com/ ), US ( I'm not 100% sure, but I think Ulta stocks Bourjois )

Too Faced Blusher- UK and US ( http://www.beautybay.com/ )


Saturday, 4 February 2012

Nail of the Day: My Private Jet by OPI


So, I'm back to my dark nail varnish! 'My Private Jet' is very similar to 'Twilight' by Ciate Paint Pots, but instead of golden flecks, 'My Private Jet' is packed full of silver shimmer with reddish undertones. I absolutely adore this colour! Definitely one of my favourites.  


I hope you have a wonderful day and as always feel free to ask me any questions :)

Thursday, 2 February 2012

Glossybox: January 2012


What was in January's Glossybox?
-Eyeko Skinny Eyeliner
-Clarins Extra Firming Night Cream
-Clarins Extra Firming Day Cream
- FAB Body Moisturiser 
-Murad Hybrids Skin Perfecting Primer- Dewy Finish

and also this little treat below :) 


The first item in my Glossybox was this Eyeko Skinny Eyeliner in Plum. At first I was a bit bewildered by the shape of this product but after some research I discovered it was a handy contraption so that you can sharpen the eye liner right down and you still have a handle. I am not overly impressed by the pigment of this product as you do have to go over it a couple of times to build up the colour. However, this product does smudge out really well so it's great if you want to create a smokey eye.

(Above: Eyeko Skinny Eyeliner in 'Plum')
~

The second item in the box was this Murad Skin Perfecting Primer which is supposed to give a dewy finish. The product has a thin, silky consistency and a little goes a long way. It is slightly tinted, so may not be suitable for pale skin, but on darker skin tones it blends in really nicely and evenly. I've not yet tried this under foundation but I shall give an update, once I have done so.

(Above: Murad Skin Perfecting Primer and the blended in product to its right)
~


The next item was this FAB Body Moisturiser. This product is meant to nourish the skin, relieve dryness and lock in moisture. The first thing I have to say about this product is about its packaging. As the moisturiser is so thick it is really hard to squeeze it out of the bottle, so I think this would be better suited for tub rather than a bottle. This is an all natural product so is unscented, which is good if you plan on wearing a perfume and you don't want the smell of your moisturiser to overpower it. This sinks in really nicely to your skin and leaves it feeling nourished and fresh. 

(Above: FAB Body Moisturiser)
~


The next two items in the Glossybox were the Extra-Firming day and night creams from Clarins. I was really glad when I received these as I have used them before and loved them. The day cream has a nice and light formula, perfect for underneath your foundation as it sinks in really well and creates a nice moisturised base.

(Above: Clarins Extra Firming Day Cream)

The night cream has a thicker consistency than the day cream, as you would expect from a night cream. This feels absolutely luxurious when applying to your skin, it melts in and leaves your skin feeling smooth and supple.

(Above: Clarins Extra Firming Night Cream)

If you are not subscribed already, you can subscribe here ( http://home.glossybox.co.uk )
Glossybox is a monthly subscription which costs £10 plus p&p, which you can cancel at anytime.

I hope you find this helpful and let me know what you thought of your Glossybox or if you have any questions about it, feel free to ask :) 

Wednesday, 1 February 2012

Drugstore Vs. High End: Volumizing Mascara Review

Today, I will be comparing Yves Saint Laurent Luxurious Mascara Shocking Volume and Maybelline Volum' Express Cat Eyes Mascara, which both claim to be volumizing mascaras. 


Yves Saint Laurent Luxurious Mascara Shocking Volume
I bought this mascara when I was at the Yves Saint Laurent counter looking for a nice lip gloss, when the YSL representative insisted she try their new mascara on me. She applied it just on the tips of my eyelashes, on top of the mascara I was already wearing. When I looked in the mirror I was initially impressed and purchased the mascara. However, when I used it at home by itself, I wasn't as impressed. This mascara has a very thick consistency and tends to clump at the tips of your eyelashes when applied. It also smells very perfumed which is a little odd considering it's a product for your eyes! As for it volumizing effects, it does add volume but it just looks a bit clumpy and thick.


(Above: YSL Shocking brush)


 Maybelline Volum' Express Cat Eyes Mascara
I bought this mascara, as I was always a fan on the original Colossal mascara. I would say that the formula is pretty much the same, the Cat Eyes possibly has a slightly thinner consistency. So, the main difference is the brush. The Cat Eyes has a quite a narrow, spoon shaped brush which I think is ideal for applying mascara as you can really get it into the base of your eyelashes, which aids the volumizing affect of the mascara. It separates and defines your eyelashes really well and because of the shape of the brush it also fans them out nicely.

(Above: Maybelline Cat Eyes brush)


..and the winner is : Drugstore!

I hope you have a fantastic day, and feel free to ask any questions :)

Nail of the Day: Purple With A Purpose by OPI


So I decided to paint my nails a fun, bright colour as lately I've been wearing black, gray, dark purple, dark blue and so on and so on. The quality of this varnish, as with all OPI nail lacquers, is excellent. The first coat does apply a little thin but with the second coat, you get the bright, dazzling shade you see in the pictures. 


Hope you have a wonderful day, and as always feel free to ask any questions :)

Tuesday, 31 January 2012

Top 3 Highlighters / Review


A review of 3 of my favourite highlighters. These are:
-Benefit High Beam
-MAC Cream Colour Base in 'Pearl'
-MAC Iridescent Powder in 'Silver Dusk'  

Benefit High Beam
High Beam is described as a 'Satiny Pink Liquid Highlighter'. The colour is a very light pink, with slightly blue undertones, so I would recommend this for paler skin colours. Benefit also offers 'Moon Beam', which I would recommend for darker skin tones. This product is so pigmented, but not over shimmery (see photo below) which is the problem with many highlighters on the market. The brush makes it super easy to apply, and it blends really nicely. As for the durability, it lasts really well and doesn't begin to look greasy towards the end of the day. 

(Above: High Beam with blended in product to its right)
~


MAC Cream Colour Base in 'Pearl'
Pearl is described as 'Pale Gold with icy shimmer'. By this description you think that this would be for darker skin tones because of its golden colour, but this colour really is suitable for most skin tones. This product is quite pigmented, but more subtle than the High Beam, so more suitable for daily use. The consistency is thick and creamy so it does take a little effort to blend (I just use my finger to apply), but once blended it gives a really nice , subtle sheen. I wouldn't say this stays put quite as long as the High Beam, but lasts without spreading shimmer down your face! 
(Above: Pearl with blended in product to its right)


MAC Iridescent Powder in 'Silver Dusk'
Silver Dusk is described as 'Pinky Beige with Silver Shimmer', which makes it sound very shimmery, and although it's more shimmery than High Beam and Pearl, it's not as it sounds. It's a less subtle sheen than the other two products mentioned, so not recommended for everyday use. But as a special occasion highlighter, this is the best! I apply this using my MAC 130 Short Duo Fibre Brush and just tap it along the top of my cheek bones. It spreads out nice and evenly and the light really reflects off it. As this is a powder product it stays put for hours and hours without budging!

(Above: Silver Dusk with blended in product to its right)

(Above: MAC Iridescent Powder in 'Silver Dusk')

Hope you find this helpful, and feel free to ask any questions :)

Where yu can purchase the products mentioned:
You can get both MAC and Benefit products from department stores such as Debenhams and Selfridges in the UK and stores such as Sephora and Nordstrom in the US.
Also online at: